A while back, I posted about how to use TORTOISE 2.0/2.5 for preprocessing Diffusion Weighted Images (DWIs), create tensors, and then do blip-up blip-down correction. All of those steps relied on using a graphical user interface (GUI) through a program called IDL to tell TORTOISE what you wanted it to do. This was often a tedious process, as it required someone to click buttons for every single subject, even when all subjects had been collected in the same manner. Enter TORTOISE 3.0, a new suite of command line programs for doing what TORTOISE 2.0/2.5 did, but faster and more scriptable!
First thing’s first, go download TORTOISE 3.0 (it’s now split into DIFF_PREP and DIFF_CALC downloads). The next thing you’ll need to do is add TORTOISE to your path. I personally like to put all of my MRI-related applications in one folder. So for me to add TORTOISE to my path (on my Mac), I would do the following:
echo "export PATH=$PATH:/Applications/mri/TORTOISE_V3.0.0/DIFFPREPV3/bin/bin" >> ~/.bash_profile
Also useful at this point is to copy the default registration settings to your home folder:
mkdir ~/DIFF_PREP_WORK
cp /Applications/mri/TORTOISE_V3.0.0/DIFFPREPV3/example_registration_settings.dmc ~/MySettings.dmc
You’ll then need to close the shell and open a new one. Or you can “source ~/.bash_profile” to load the changes into your current shell. Now you’re all set. Let’s look at some data! If you’re not already organizing your data according to the BIDS spec, I would highly suggest you start! It makes your file structures regular and really makes it considerably easier for new people to start working on your project! For now, let’s assume that my data is in some kind of BIDS-like format as follows:
sub_001
     anat
           sub_001_T1.nii.gz
           sub_001_T2.nii.gz
     dwi
           sub_001_dwi.nii.gz
           sub_001_dwi.bval
           sub_001_dwi.bvec
The first thing that we need to do is skull-strip our T1 and T2 images and it generally helps if you put them into some type of axilized orientation (something approximating AC-PC alignment would be good). We can do this easily in AFNI, first start by skull stripping both T2 and T2 images:
3dSkullStrip -input anat/sub_001_T1.nii.gz -prefix anat/T1_ss -orig_vol
3dSkullStrip -input anat/sub_001_T2.nii.gz -prefix anat/T2_ss -orig_vol
Next bring your T1 into “AC-PC” alignment using the handy @auto_tlrc script, copying the result into a file we’ll affectionately call “T1_ss_acpc.nii”:
cd anat/
@auto_tlrc \
-base MNI152_1mm_uni+tlrc. \
-input T1_ss+orig \
-no_ss \
-init_xform CENTER \
-rigid_equiv
3dcopy T1_ss.Xat.rigid+tlrc sub_001_T1_ss_acpc.nii
Next we’ll align our T2 to our already setup T1 and rename the output to “T2_ss_acpc.nii”:
align_epi_anat.py \
-anat T1_ss_acpc.nii \
-epi T2_ss+orig. \
-epi2anat \
-anat_has_skull no \
-epi_strip None \
-suffix _al2acpc \
-rigid_body \
-epi_base 0 \
-giant_move
3dcopy T2_ss_al2acpc+orig. sub_001_T2_ss_acpc.nii
cd ../
You probably feel like you’ve already had your typing workout for the day! But that’s just getting the files setup the way that we need them to be setup! Now we’re ready to actually use TORTOISE! The initial processing in TORTOISE has two steps: 1) importing the NIFTI files, and 2) running DIFFPREP. One random bit, TORTOISE doesn’t seem to (currently) play with gzipped files, so we expand that:
cd dwi
gunzip sub_001_dwi.nii.gz
ImportNIFTI -i sub_001_dwi.nii \
-p vertical \
-b sub_001_dwi.bval \
-v sub_001_dwi.bvec
Let’s just review the options, the -i is the input file, the -p is the phase encoding (AP would be vertical, LR would be horizontal), the -b is the b-values, and the -v is the b-vectors.
Now that we have the data imported, you’ll notice that there’s a folder in the current directory (sub_001/dwi) named sub_001_dwi_proc. In this folder, we’ll actually execute the DIFFPREP step (it’ll copy some temporary files into the folder that you execute it from and I like to keep my file directories as clean as possible!
cd sub_001_dwi_proc
DIFFPREP -i sub_001_dwi.list \
-o sub_001_DMC \
-s ../anat/sub_001_T2_ss_acpc.nii \
--reg_settings MySettings.dmc
Again let’s review the options: the -i is the input list, the -o is the output name (here I like to end with DMC to keep with the naming convention of TORTOISE 2.0/2.5), the -s is my structural file (this is a T2 image), and the –reg_settings is your registration setting file that is located in your home directory’s DIFF_PREP_WORK folder. You could of course have called yours something different and be a rebel.
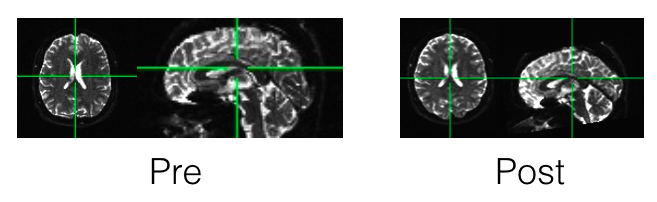
While the differences aren’t always astounding from just looking at the images, I feel like I have to put some brain imaging in every post, so here you go!
From here you can use AFNI’s FATCAT programs (part 3 is particularly relevant) to fit your tensors, and do ROI-to-ROI analyses. You can also use Freesurfer (easily run in parallel) and TRACULA (also able to be done in parallel). Stay tuned for next time, I’ll run through the next step of DR_BUDDI if you have blip-up and blip-down data. We’ll then tie in the full AFNI pipeline for more analysis possibilities.