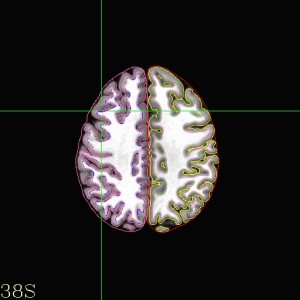
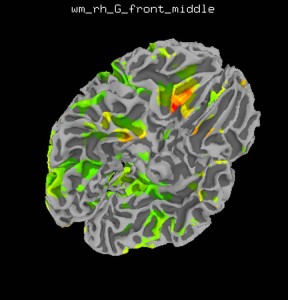
I had previous posted about displaying the fMRI results onto the cortical surface. It’s been brought to my attention that this post wasn’t as clear as it could be! I know, it happens from time to time! So let’s try this again! Let’s start with a straightforward topic – processing data at the single-subejct level on the cortical surface. There are a variety of reasons that you might want to do this!
- Surface-based registration methods are likely superior to volume registrations
- Surface-based analysis allows you to smooth along the surface, which is better.
- Surfaces look pretty
- And many others…
Generate Cortical Surfaces
First thing is first. You generate your cortical surfaces using Freesurfer, BrainVoyager, Surefit, Caret, or rumor has it BrainSuite. I have the most experience using Freesurfer, so for the purposes of this post I’ll use Freesurfer examples. Freesurfer relies on the recon-all script for generating the cortical surfaces. In general, I like to run the entire pipeline and then check if anything went wrong. So start with:
recon-all -s SubjectName -i /path/to/anatomical/NIFTI/file -all -3T
I add the -3T option in case you’re running on a 3T scanner, Freesurfer will do some additional adjustments to the images to get a decent segmentation. After you start this process, be prepared to wait between 16-30 hours for the process to finish. If you find yourself processing quite a few participants data and looking for some way to parallelize the process, checkout this previous post.
At the end, you will be greeted with a message telling you whether Freesurfer succeeded or failed. In general Freesurfer succeeds as long as you don’t have extreme motion artifacts in your anatomical scan.
At this point, I would recommend that you verify the skull strip is good, and check the gray/white boundaries and surfaces. Of course if you’re daring, you might skip these verification steps and just hope for the best. But I wouldn’t recommend it!
Convert Freesurfer files for use with AFNI
If you go through the subject directory that Freesurfer created, you’ll notice that most of the files are in a format with file extension “.mgh”. In order to use the cortical surface (and other Freesurfer generated files) with AFNI, you need to convert them to either HEAD/BRIK or NIFTI (volume) or GIFTI (surfaces). The process to do this is with a script in AFNI called @SUMA_Make_Spec_?? where ?? is the software you used to create the cortical surface. In this case our script would be @SUMA_Make_Spec_FS for Freesurfer. Other options are Carat and Surefit.
cd /directory/of/subject/processed
@SUMA_Make_Spec_FS -sid SubjectName -GIFTI
This will create a SUMA folder inside of the Freesurfer output folder. The -GIFTI is optional, but recommended for interchangeability of the files with other software packages. I recommend that you move this SUMA folder to the folder with all of your other MRI/fMRI related files for safe keeping.
Perform Single Subject Analysis with afni_proc.py
It turns out that uber_subject.py/afni_proc.py have all of the tools you need to perform single subject analysis on the surface, similar to how we performed the analysis in the volume (afni_proc.py, uber_subject.py). If you’re using afni_proc.py, you’ll want to pay attention to Example 8 of the help.
The fundamental changes you need to make are
- Add a surf block after the volreg block.
- Remove the mask block.
- Remove regress_est_blur_epits or regress_est_blur_errts.
- Add a -surf_anat option pointing to the file SubjectName_SurfVol in the SUMA directory
- Add a -surf_spec option pointing to the spec file SubjectName_?h.spec
Check coregistration of surface and volume
Change into the directory with your afni_proc.py results and launch AFNI and SUMA
afni -niml &
suma -spec ../SUMA/SubjectName_both.spec -sv ../SubjectName_SurfVol_Alnd_Exp+orig
Once SUMA is loaded, press the t key and you will be presented with a nice overlay in AFNI that will allow you to click around in either AFNI or SUMA and see how the cortical surface corresponds to the volume in AFNI. Check to make sure nothing looks too far out of whack (technical term).
Load statistical data in SUMA
If you like a clean setup, close both AFNI and SUMA. Now reopen SUMA:
suma -spec ../SUMA/SubjectName_both.spec -sv ../SubjectName_SurfVol_Alnd_Exp+orig
Right click on the brain to select a node and press Control+S to open the Surface Controller. This will allow you to specify a surface overlay using Load Dset. Adjust the overlay threshold and conditions to your liking.
Show your figures in an article or poster, become rich and famous… Relatively speaking.

