You may have just upgraded to macOS Catalina 10.15 and noticed that EVERY. SINGLE. TIME. YOU. OPEN. THE. TERMINAL. You get a warning about changing the default shell to zsh instead of bash. There’s an Apple help page about it, but in case you just wanted to google the answer and find it here, the secret is to add the following to your ~/.bash_profile.
Say that you want to have an experiment where the background color changes based on a particular condition. This is a fairly common thing to do, but it’s necessarily straightforward in PsychoPy. Since every time I write a new experiment, I end up googling this and going through the usual steps to try and find a “good” solution – I figured it’s time to write it down.
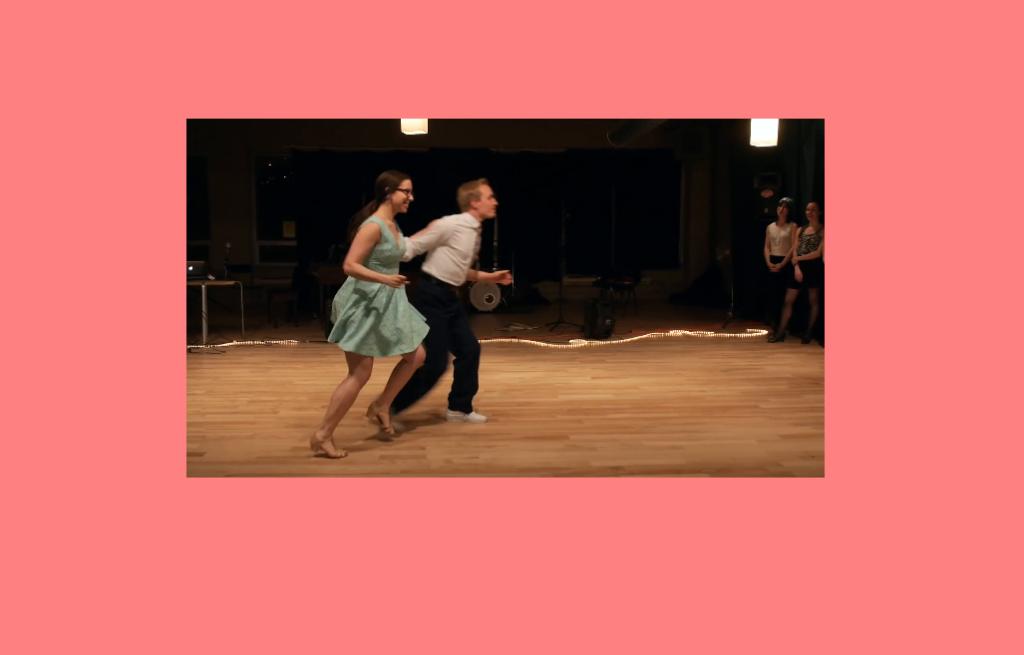
In this particular experiment I wanted to have a type of video stimulus that was surrounded by a background color representing additional information to the participant. You can think of this as “Category 1” vs. “Category 2” just to help participants keep track of the stimulus sets they’re seeing. An example stimulus might look like this (borrowed from this amazing clip of Skye and Naomi dancing):
Skye and Naomi Dancing Lindy Hop
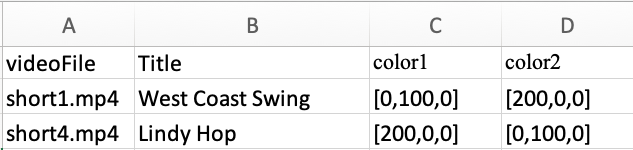
Now with any well designed and modular PsychoPy experiment, we have a list that that conveys the stimuli and in that list we might want to specify titles for the videos and background colors:
List file containing stimuli and related information (including color)
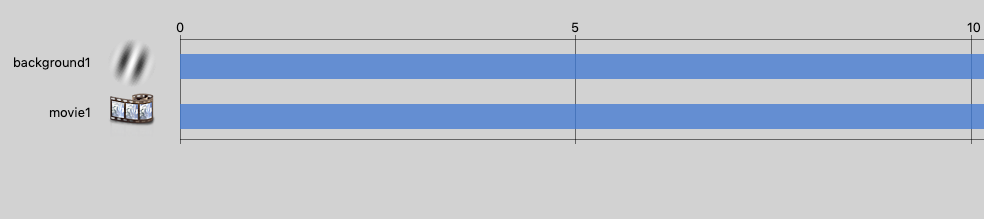
The next step is to construct a fairly simple PsychoPy experiment that has a loop that will contain the trials. This loop has two components, the first is just a title of the video (Title from above) and the second is the actual video with the background color (green or red):
Experiment Flow
Turning our attention to the second “ShowVid1” object/routine, we have two components, the first is a grating object, and the second is our movie object. My understanding of PsychoPy is that it draws in order, so you want the background first and the video second, so that the video appears on top of the background – yes I tried it the other way and as expected the video was underneath.
The components of ShowVid1
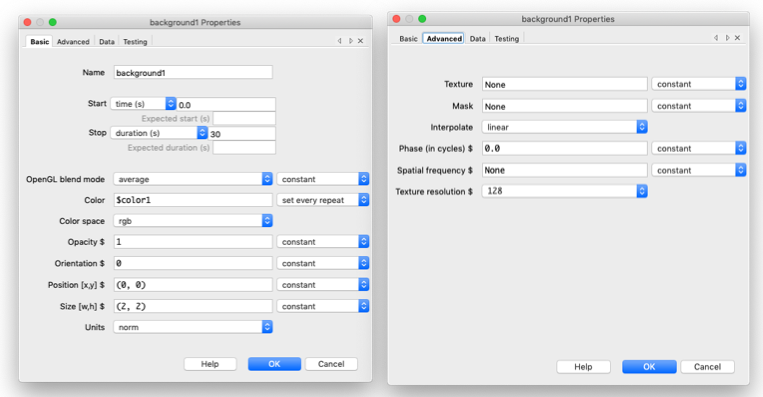
Now we define the grating object as follows, the duration, color, size (2,2), and units to “norm”. Under “Advanced” make sure you change the Texture to “None” and the mask to “None”. Also don’t forget to set the “Color” component to “set every repeat” otherwise PsychoPy will be angry with you and likely won’t run, definitely won’t change with each stimulus.
And there you have it, a PsychoPy experiment with a background that is dynamically set and does so at the start of a routine (unlike using the setColor() function, which would change it after the start of the routine.
This content kindly provided on the PsychoPy message boards courtesy of Jonathan Peirce, the developer of PsychoPy. Hopefully putting it here makes it easier to find for everyone, and obviously for me!
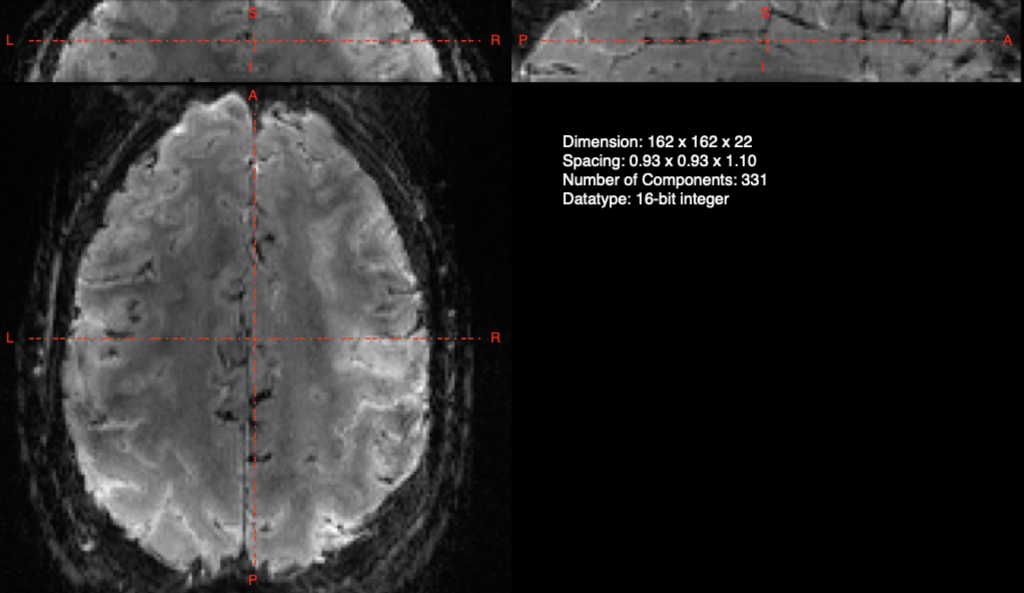
One of the benefits of high-resolution fMRI (e.g. 7T+) is the ability to see smaller structures and even discern layers of the human cortex (examples: motor cortex and DLPFC). One of the frustrating things about doing sub-1mm resolution is that you’re often constrained to partial volume coverage. Which means that you generally have something that looks like this:
Our “Slab” Partial Volume EPI
And if you have’t already tried, that means that registration of these partial volumes is often more difficult than when your functional images (EPI, etc) cover the entire brain. This is true of all software packages (FSL, AFNI, and yes even ANTs).
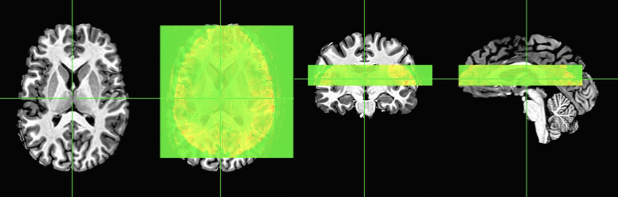
Right out of the box your two images might look something like this:
Default view of images off the scanner
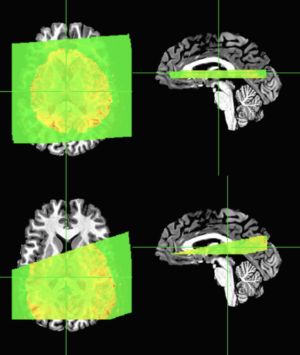
Now we can clearly see that the default AFNI view with no transformations shows the slab in the wrong position. On the left I have just the axial slice, followed by the axial slice with the overlay showing significant mis-alignment – caused primarily from the slab being too low in the brain. If you were to attempt to register this slab to the whole-brain anatomical using a standard process like align_epi_anat.py, you’d get something like this:
Default alignment that works fine on whole-brain images
The top row of images were made using a pretty standard call that works fine on whole-brain EPI images:
And the second row of images was made with a slight modification of adding “-partial_axial” flag, which sometimes works if you have sufficient coverage AND the images aren’t terribly far off. Note that this sometimes works if the slab has the correct header/scanner information on image orientation and location relative to the anatomical images.
It turns out that one thing can be really helpful in getting automated registrations working with partial volumes is to get the the base and source as close as possible. Yes, that’s an obvious statement!
In AFNI, the way we do that is by first moving the images into the correct location. Since the slab data here is cutoff on the top and bottom, I’m also going to add some zero padding around the images to help with the process.
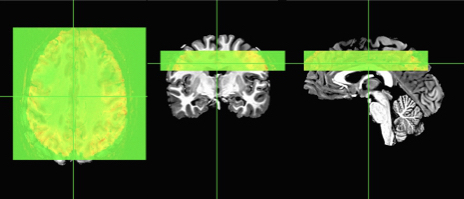
Here I add 20 empty “zero” slices above the image and 20 slices below the EPI. In the second statement, I simply move the origin of the image 20 mm up, which is like a lightyear in brain space! Now my images look closer, but still not aligned.
New image overlap without registration
At this point, we can attempt some alignment using any of your favorite alignment programs. Since I like AFNI, I’ll use the veritable 3dAllineate with some options that are fairly similar to what I would use on other imaging data. You could also use align_epi_anat.py, or even options within afni_proc.py.
Now you can see that the slab is correctly aligned with the skull-stripped anatomical. The two axial slices are just to show you with the overlay on and off. You can also see that this is a far cry from the original locations and those registrations shown earlier in this post.
Happy Registering! This post made possible by the amount of time it takes to register 300 brains to a new template and do deformation metrics on them! Yes, paper coming soon.
This is mostly a quick note to remind myself how to do this, since I spent about 30 minutes today “remembering” (synonymous with googling) how I got this to work last time! That said: Once upon a time, many of us would connect to a remote (usually linux) server and run graphical programs over the network. That usually meant connecting to a box like so:
ssh -X -Y myuser@myserverbox.mydomain.com
Where the -X and -Y were donating SSH forwarding for X11. Side note: usually you had to also enable this on the server in /etc/sshd_config under the very readable setting “X11Forwarding”. In addition to running the programs remotely, you also had the option of choosing between Direct Rendering and Indirect Rendering. Direct Rendering was when your computer received the information to render the images directly. Whereas Indirect Rendering had the server render the images and beam them over to your computer. Not surprising, Direct Rendering is usually faster. For a quick refresher on what all of the general terms are, checkout this awesome post.
Either way, we could then do things like run a remote X11 application and have it pop open on our computers:
xclock
With the advent of things like VNC and NoMachine, where we can actually view the remote computer’s desktop and interact with things, many of us transitioned away from SSH X11 Forwarding. Nevertheless, some users continue to persist and occasionally point out that things don’t always work the way they used to – particularly if you love Apple Macs as much as I do. Recent changes in the XQuartz project may have broken some of this functionality as of 2.7.9. But never fear, with the release of 2.7.10 (and now 2.7.11) you can reenable this functionality by running this command in the terminal:
While I’m not sure it’s necessary, you can also then export a variable to “force” indirect rendering:
export LIBGL_ALWAYS_INDIRECT=1
And finally, as you could have guessed, AFNI and SUMA can both be used with X11 Forwarding! SUMA in particular seems to appreciate indirect graphics, but as always, your mileage may vary. If you find that this is too slow for you, I’d recommend mounting the remote server using FUSE (Mac version here) and SSHFS. You can then run AFNI/SUMA locally while accessing remote data. Obviously you can also use Samba (SMB) or other networking tricks too.
For most users of imaging software, we use the skull stripping program included in our distribution. If you’re an AFNI user, you probably use 3dSkullStrip, if you use FSL then it’s BET, and of course Freesurfer has their own in recon-step 1. A few years ago, I advocated for using Optibet and even wrote an entirely AFNI based version of the pipeline.
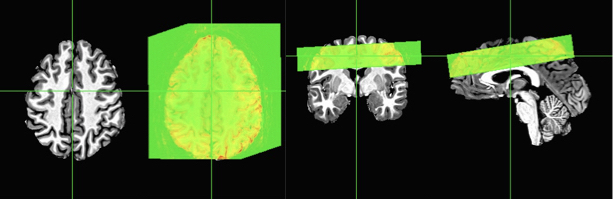
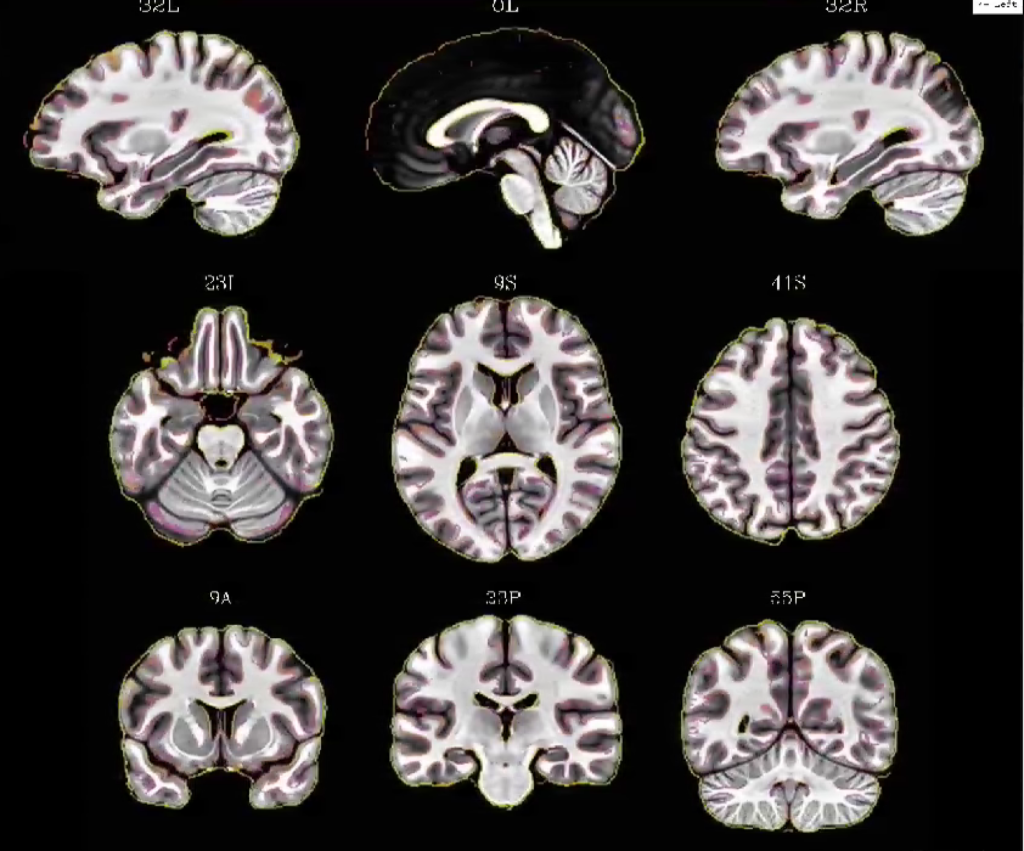
If you want to get all of the benefits of an Optibet like pipeline as well as doing your whole-brain normalization via a combination of linear and nonlinear warps, look no further than the “recently” introduced script in the AFNI distribution @SSwarper. This program takes your original T1 anatomical image and does a robust skull stripping, as well as normalizes to the MNI152 brain via both a linear and nonlinear warp. It even generates helpful output images to double check the output like the one below!
So check it out, it’ll also make your afni_proc.py commands even more efficient, because you can feed the output to the AFNI superscript. Helpful if you tend to run afni_proc.py with multiple options, you won’t have to rerun the normalization step over and over again (which can cost up to about an hour each time)!